Sunday, September 28, 2014

Using Pinterest to Find Great Classroom Ideas


Do you use Pinterest to find fun teaching ideas? Pinterest is one of the simplest resources to use, and is filled with links to amazing ideas!  The best thing about Pinterest is that you can glance at a picture and decide in a second rather something is worth a deeper look, or not.

Here are a few tips on how to better utilize Pinterest as a tool to find teaching ideas.

Tip #1:
Use the search bar!!!!!!!!!!!
You can type nearly anything in the search bar and you will get results. Teaching point-slope form this week? Type “point-slope form” into the search bar, and voila ideas will pop up! Teaching right triangle trig? type that in!

Tip #2:
Pin, send or like pins that look promising! 
I’ve been pinning for quite a while now. Sending and liking pins is new to me though. When you hover the mouse over a pin a few options pop up (see above picture!) If you click the “pin it” button, you will be able to pin that pin to one of your Pinterest boards. If you click the “send” button, an option will pop up that will allow you to write a message, then send the pin to one of your other Pinterest friends, OR to an email address. To send to an email address simply type the address into the bar that pops up. Liking a pin is a way to keep track of ideas without committing them to a board. If you choose to like a pin it will be stored on your main account page. There is an option (shown below) to view all likes. I often like items that I know I want to take a better look at, but don’t have time for at the moment. Later, I check out all of the items I liked. If the pins are a fit for what I need/like/could use, it gets moved to a board. If not, I unlike it by simply clicking the heart on the pin again.

Tip #3:
Follow other boards on topics you like, or need. 

After you have typed in a search term the Pinterest default setting is to show you pins that match your search. By clicking “boards” you can change that view so that you can see entire boards that match the topic you are searching for! Liking boards will make it so that pins those pinners add to those boards will show up in your Pinterest newsfeed. One thing I look for when I search for new boards to follow is the amount of pins pinned to a board. Sometimes I follow boards with less than 30 pins, but my general rule is 30+. I have found that boards with a lot of pins starting out usually indicates that the owner of the board is an active Pinterest user. 
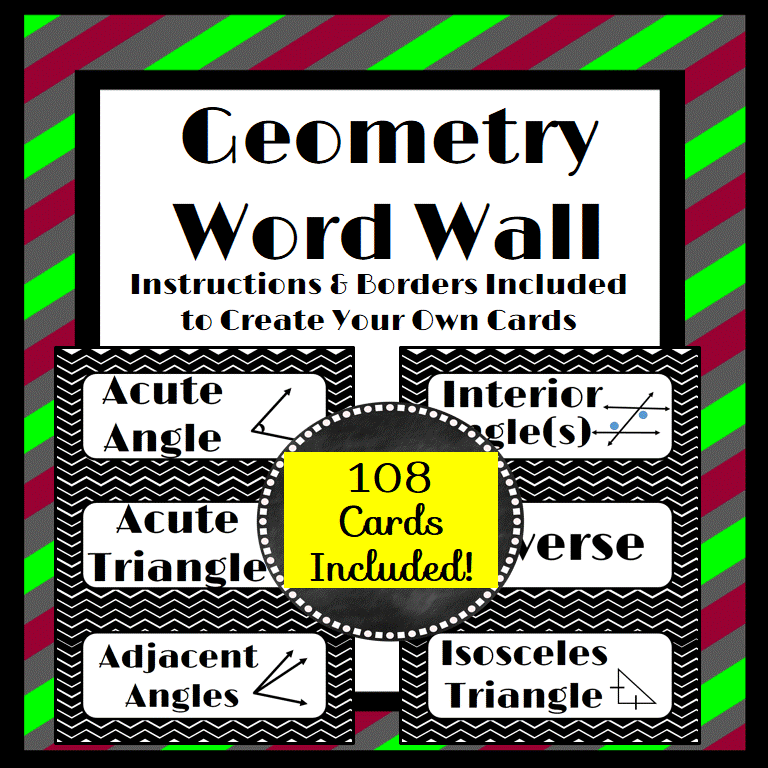
It’s nice to have other people find pins on topics I like! Saves me time! J I follow many boards that are titled "Algebra", "Geometry" or "Secondary Math" because pins put on those boards are ones I like having on my school boards.  

Do you use Pinterest? What are your favorite boards to follow? Please post you Pinterest url - I love finding new boards to follow! You can find me on Pinterest here: http://www.pinterest.com/4theloveofmath/


Thursday, September 25, 2014

Best Places to Purchase "Nerd' Gear


I love math. I think it is one of the neatest things. I love looking for patterns out in the world and applying math to situations.
Major geek here! In fact I realized earlier today that it is Math Storytelling Day

One of my favorite things to do on math holidays is to wear T-shirts that proclaim my geekiness to the world. I may have a minor ok fine, major obsession with geeky t-shirts. Just in case there is anyone out there who likes shirts that express your inner nerd, I thought I'd blog about some of my favorite places to purchase fun shirts. These shirts are fun to wear on T-shirt day (if your school has them) or special math days - like Pi Day/Albert Einstein's Birthday (3/14), eDay (2/7), World Math Days (next one is scheduled: 10/14/2015, Fibonacci Day (11/23) , or Powers of 10 day (10/10). 

Here are some of my favorite nerdy-math-teacher shirts (with links!)::

Under $15:


Pricier ($20-$30) But So Worth It: 
Perfect to wear while teaching introduction to real numbers:
Algebra II students would love knowing that they are some of the only people in the school who can understand the joke of this shirt:
I don't have this one YET but wouldn't is be perfect to wear on "solving multi-step inequality" day?!?! I have students solve this inequality every Valentine's day just for fun. They always think it is so neat! 

I totally own the majority of these and more...... Don't tell my husband! :) I also have one that I love that says "Lottery: A tax on people who are bad at math."I wouldn't wear it at school, but it's fun to wear around town. We don't have the lottery here in Alabama so I don't think it offends too many people. 

Do you have any fun, nerdy math shirts? Know of any great places to shop for fun clothes? Think GeekLOLShirts (funny & cheap!!), and Spreadshirt (if you do a search for "math" lots of options pop up!)


Fabulous Fonts for this post are from: KG FontsBrittany Murphy Design
Backgrounds, frames & Clip Art are from: Glitter Meets Glue & Ashley Hughes

Friday, September 19, 2014

Fabulous Freebies Friday

Hello! Today I am linking up with Fabulous Freebies Friday hosted by: Always a Teacher & Forever a Mom
The freebie I want to share today is a set of Guided Notes for solving one and two step equations.
These guided note have really helped my students a bunch! Being able to read through the directions to solving the equations and having each step described has made a huge difference! When I had students take their own notes while I lectured, they often missed steps, or didn't make notes reminding them of why they were doing certain things. These notes eliminate the need for them to write extra notes of their own.

To download this set, click on the picture below:
Make sure you visit the link party to see out what other freebies bloggers are offering this week!

Thursday, September 11, 2014

Managing Classroom Management: Use a Seating Chart

Confession Time:
You know how some people are just born teachers? They walk into a classroom for the first time and immediately students stop talking, sit in their seats, and pay attention? I am not that kind of teacher.

Classroom management has always been (and will always be) a struggle for me. There have been many times when I have wanted to run out of the classroom, hide in the bathroom and cry. I am not a natural leader and my presence alone does not demand respect from my students. Luckily, having that special "teacher power" in the classroom is not entirely necessary. 
Luckily, there are ways to manage a classroom without being a natural born manager. One way I've written about before is to keep students active. Switching activities throughout a class period keeps students on their toes and gives them less time to act up and be disruptive. 

Another thing that I have found helpful is a seating chart. Sitting students 4 to a group has worked wonders for me. 4 is my "magic group number." Groups of 4 work great if your groups are balanced. Balancing takes a little bit of time but is so worth it! A fantastic group of learners is made up of 4 parts. 

Part 1:
The high achiever: This student is one you can count on to figure out new material within minutes. This student always completes their homework, always raises their hands to answer your questions, and accepts nothing less than an A. 

Part 2:
The above average student: This student tries to do well, but struggles a tiny bit in class. They won't always receive the highest grades, or finish their work first, but they do their best and perform above average.

Part 3:
 The low achiever: This student does enough in class to get by, but is not motivated to do more. They are often lazy, easily distracted and careless.

Part 4:
The struggling student: This student does not do well in class - is often just barely passing. They have a hard time with pretty much anything, have a hard time in class and really struggle. 

Together these 4 students create the ideal group of learners:
This group works well because each student has their place. They each have their own individual strengths and weaknesses. The high achiever often becomes the person other students in the group go to for answers (replacing you! as their first contact when they have questions). The high average student works with the high achiever to relay information and teach the other members of the group. The low average and struggling student are the learners of the group. The low average student learns a lot from the high average student, and is often able to simplify the information in a way that allows them to teach it to the struggling student. They each pass information along to one another and they are almost always able to work together to solve problems thrown at them with little or no intervention from the teacher.

Splitting students into groups can take time, but it is well worth it! There are many ways to determine what level students are at. I prefer to use observation, and classwork performance to split students up. I created these printable cards to help with the sorting:
An editable version of the cards can be downloaded here 
(PowerPoint file):  Seating Cards.

Creating cards for each class period starting from day one helps a lot! Each card has a students name, and class period. The boxes at the top are for recording which type of group member the student would make. Color coding the small boxes at the top helps keep the cards organized. High achieving students have their top box colored yellow, high average are purple, low average are blue, and struggling students are red. Makes it super easy to organize cards into groups! There are 6 boxes at the top so that the cards can be used to group students at least 6 different times.

Here is a picture of cards I was organizing into the various levels:
Here's a picture of my cards organized into groups:
Groups of 4 make it especially easy to split students up to complete group work. There are 2 different ways to split groups in partner groups. Really there are 3 different ways - BUT I do not personally EVER have high achieving students work one on one with struggling students. It just doesn't work. The struggling student resents how easy things are for the high achiever, and the high achiever gets frustrated that they are doing all of the work.

The best partner groups are:
High Achiever -> High Average
Low Average-> Struggling
OR
High Achiever->Low Average
High Average->Struggling

This method has really worked well for me so it's what I've stuck with. I'd love to hear how other teachers manage their classroom seating arrangements.

Do you assign seats to your students? How do you group them and how do you determine where each student sits?

Leave a comment and let me know! :)

Have a fantastic week!


PS: If you have extra students (can not equally split students into groups of 4) try forming one or two smaller groups. With 1 extra student form one group of 3 and one group of 2. With 2 extra students form one group of 2. With 3 extra students form an extra group of 3. Groups that have 3 students should include a high achiever, high average, and low average. Groups of 2 should have a high achiever and high average OR a high average and low average. Do your best to have struggling students be included in groups of 4!

Friday, September 5, 2014

Five for Friday {Sept. 5}


http://doodlebugsteaching.blogspot.com/2014/09/five-for-friday-linky-party-september.html
This week has been rather random. So, I decided to link up with Doodle Bugs Teaching's five for Friday weekly linky party to share 5 random things from this week!


My absolute favorite day of the week was Monday (Labor Day). Dixie has heard kids at school talking about skating and has been begging me to take her. Monday I woke her up, had her get dressed and stuck her in the car. She had no idea where we were going until we actually pulled up to the skating ring. She was so excited! We had a great time. I totally fell more than she did though - it's been 20yrs since I've worn regular skates! Hehe! She used to take ice skating lessons and practiced all the time so it was an adjustment for us to figure out non-ice skating. Sadly this is the only picture I took of the trip.
 
 
The side ponytail totally takes me back to the 90's! Remember when those were popular?!?  
 
The majority of my week has been spent working on Unit 4: Geometry Interactive Notebook pages. When I post things to Teachers Pay Teachers I always aim to post my best work. I feel like I poured my soul into these pages. I started with some great ideas, but then hit a brick wall. So, I took some time off then went after it with a vengeance this week. One of my best friends is teaching Geometry this year so I sent it to her for approval last night and she sent it back this morning with her "looks great can't wait to use it!" stamp. Phew!
One day soon I will write a post on interactive notebooks. I truly believe in using interactive notebooks with middle & high school students. I feel like I fill my mind with tons of extra tidbits I had forgotten just in assembling the INB packets I create so that I can take pictures to show how to put the pages together. Creating pages helps cement information into students brains! They keep students engaged and excited about math which for me, is one of my major math teacher goals.
 I have a minor obsession with couponing and money saving deals. My favorite website for deals is: Hip2save.com. The site makes it so easy to find great deals! One of the things I learned about from the side is Amazon's subscribe and save program. This week my monthly subscribe and save order from Amazon was delivered. This is about half of it:
 
If you have never used subscribe & save, you are missing out!!! Subscribe and save offers a cheap way to have items you need every month delivered to your home monthly at a reduced price (shipping is free!!). You can cancel orders at any time - so if you see a great deal on something you'd like to try just once (like shampoo) you can get the subscribe and save reduced price for just a month. My monthly order usually includes shampoo, soap, toilet paper, and snacks. I like that you can add things like toothpaste, dish soap, cereal, pads & tampons to your subscribe and save order. Talk about convenient! Right now the oreo subscribe & save price is under $3. I had to get some for school snacks! I'm not sure how I feel about the birthday cake oreos - kind of weird! Have you tried them??
 
 
I love to read and normally read {clean} historical romance books. I decided to branch out and read something educational this month, so I ordered this book from Amazon. I haven't read much of it, but the few pages I have read have been mind opening. I wish I had read this book before I ever walked into a classroom! If you are interested here is an affiliate link to the book: Building Powerful Numeracy in Middle and High School Students. The information here makes so much sense!
 
http://amzn.to/WkVMoy
My favorite deal of the week came from Staples. I was able to get 2 packs of 20 ballpoint pens for under $4. If you sign up for a rewards card at staples you earn 5% back to spend at a later date and you get free shipping! (I HATE ever paying for shipping so that is a huge plus of having a card).
 
 I also picked up some composition notebooks. I LOVE using graph ruled composition notebooks for interactive notebooks. The graph lines make it sooooo easy to keep the notebook nice and neat! Plus, if you ever need to add a coordinate plane to a page (which in math is sure to come up at some point!) your lines are already there! At $1.99 the notebooks are a bit pricey for me, but Staples has been offering a lot of nice promo codes lately for 25% off school supplies which helps a little! 
 
What kind of notebooks do you use for interactive notebooks? Find any great school supply deals this week?
 
Make sure to check out all of the other random things that have happened this week at Doodlebugs link up. I am seriously loving the Pete the Cat pictures Kacey shared - totally adorable!
 
Have a great weekend!
*We're headed to Atlanta to visit the aquarium. I am the only member of my family who has not been so I am stoked!! Look for pictures of the trip on next weeks link up post!*


Sunday, August 31, 2014

Word Walls in Secondary Math

The first school I taught in required all teachers to put up Word Walls. I had no idea what a word wall was but since it was a requirement, I purchased some large, neon colored index cards, wrote down a bunch of Algebra vocab. on them, and glued them to the wall. While I thought it looked great, the wall was super ineffective and taught me a lot about word walls! 

A word wall is a learning tool. Students will be looking at the walls of your classroom EVERY day they attend class. Use that to your advantage by placing words on the wall that will help them in class. In secondary math it should be used to reinforce vocabulary. Every time a new vocabulary word is introduced, a word can be added to the wall. If any words come up in class that students need help with, add it to the wall too! During instructional time, refer to the word wall. Use a laser pointer or ruler to point out words as you discuss their meaning. For example, when introducing equations you may use a pointer to point to the word expression and the word equation. Then, have students identify the differences between the two. This helps students CONNECT the words on the wall. Put your word wall somewhere that is visible to all students. If you use a smart board and your board is at the front of the classroom put the word wall somewhere on the sides of the board, over it, or around it. That way when students are waiting for new information to come up on the board they have something informational to look at. Putting the word wall on a side wall or somewhere students do not frequently look will make the wall ineffective. If you need to you could even create word "wall" on a folding presentation board. That way you can easily move the board around the room.

If you are thinking about using a word wall this year (and I would suggest using one!) here are some  helpful word wall rules:
1) Write the words in dark colored ink with a white background. Colors are fantastic, but should be used as borders, not for actual word cards. 

An effective word wall is one that can be seen by all students at all times. A white background with dark ink will bring attention to the words and make them stand out. My neon colored index card word wall looked pretty cool up close, but the first time I walked to the back of the classroom to check it out I noticed that the bright colors meshed together and I found myself checking out the colors, not the words. Colored backgrounds make it more difficult to make out words from a distance, and take away from the point of the wall - the words. 
2) When possible, add pictures to the word wall! Your word wall that says "equation" on it should have an actual equation on it. The variable card should have a variable on it (or around it). A great project for early finishers in the class is to have them create pictures to go with word wall cards. It takes all of 30 seconds to have a student draw some parabolas to stick under the parabola card and students love having their work displayed!
3) Group words that go together. For unit 1 on identifying real numbers you will have words like real number, natural number, irrational number, rational number, etc. These words can go under the title header: "Real Number Sets". They can also have coordinating borders to further connect the words (and add color to the room!). You may have those cards backed with yellow paper, and your "Pythagorean Theorem" cards backed on green paper. When trying to remember real number sets on a quiz reminding students that the words they need to recall were the "yellow" words is an easy way to trigger their brain. 
4) Update your word wall as often as possible. I set a goal to update the wall weekly, but sometimes words come up that need to be added sooner. At one point I was discussing solving equations with students and discovered some of my students could not recall where a denominator was. I always kept some blank cards in a drawer at my desk and was able to quickly pull out a card, have a student write down the word, and had them add it to the wall that moment. You can bet the next time I asked students what number was in the denominator of the left side of the equation every hand in the room went up! 

My latest word wall looked something like this: 
The words were easy to distinguish and I really like the font used! (Limelight). If you are looking for a ready made word wall check out these sets I have posted in my teachers pay teachers store. Each set includes an editable version so that you can easily create your own words to add!


Have you ever used a word wall? How is your word wall displayed? I'd love to hear how you do it, please leave comments below!
Have a great weekend! 


Background for this blog post came from: Glitter Meets Glue and Emily Wean. Fonts for the pictures are from: KG Fonts.