Sunday, August 31, 2014

Word Walls in Secondary Math

The first school I taught in required all teachers to put up Word Walls. I had no idea what a word wall was but since it was a requirement, I purchased some large, neon colored index cards, wrote down a bunch of Algebra vocab. on them, and glued them to the wall. While I thought it looked great, the wall was super ineffective and taught me a lot about word walls! 

A word wall is a learning tool. Students will be looking at the walls of your classroom EVERY day they attend class. Use that to your advantage by placing words on the wall that will help them in class. In secondary math it should be used to reinforce vocabulary. Every time a new vocabulary word is introduced, a word can be added to the wall. If any words come up in class that students need help with, add it to the wall too! During instructional time, refer to the word wall. Use a laser pointer or ruler to point out words as you discuss their meaning. For example, when introducing equations you may use a pointer to point to the word expression and the word equation. Then, have students identify the differences between the two. This helps students CONNECT the words on the wall. Put your word wall somewhere that is visible to all students. If you use a smart board and your board is at the front of the classroom put the word wall somewhere on the sides of the board, over it, or around it. That way when students are waiting for new information to come up on the board they have something informational to look at. Putting the word wall on a side wall or somewhere students do not frequently look will make the wall ineffective. If you need to you could even create word "wall" on a folding presentation board. That way you can easily move the board around the room.

If you are thinking about using a word wall this year (and I would suggest using one!) here are some  helpful word wall rules:
1) Write the words in dark colored ink with a white background. Colors are fantastic, but should be used as borders, not for actual word cards. 

An effective word wall is one that can be seen by all students at all times. A white background with dark ink will bring attention to the words and make them stand out. My neon colored index card word wall looked pretty cool up close, but the first time I walked to the back of the classroom to check it out I noticed that the bright colors meshed together and I found myself checking out the colors, not the words. Colored backgrounds make it more difficult to make out words from a distance, and take away from the point of the wall - the words. 
2) When possible, add pictures to the word wall! Your word wall that says "equation" on it should have an actual equation on it. The variable card should have a variable on it (or around it). A great project for early finishers in the class is to have them create pictures to go with word wall cards. It takes all of 30 seconds to have a student draw some parabolas to stick under the parabola card and students love having their work displayed!
3) Group words that go together. For unit 1 on identifying real numbers you will have words like real number, natural number, irrational number, rational number, etc. These words can go under the title header: "Real Number Sets". They can also have coordinating borders to further connect the words (and add color to the room!). You may have those cards backed with yellow paper, and your "Pythagorean Theorem" cards backed on green paper. When trying to remember real number sets on a quiz reminding students that the words they need to recall were the "yellow" words is an easy way to trigger their brain. 
4) Update your word wall as often as possible. I set a goal to update the wall weekly, but sometimes words come up that need to be added sooner. At one point I was discussing solving equations with students and discovered some of my students could not recall where a denominator was. I always kept some blank cards in a drawer at my desk and was able to quickly pull out a card, have a student write down the word, and had them add it to the wall that moment. You can bet the next time I asked students what number was in the denominator of the left side of the equation every hand in the room went up! 

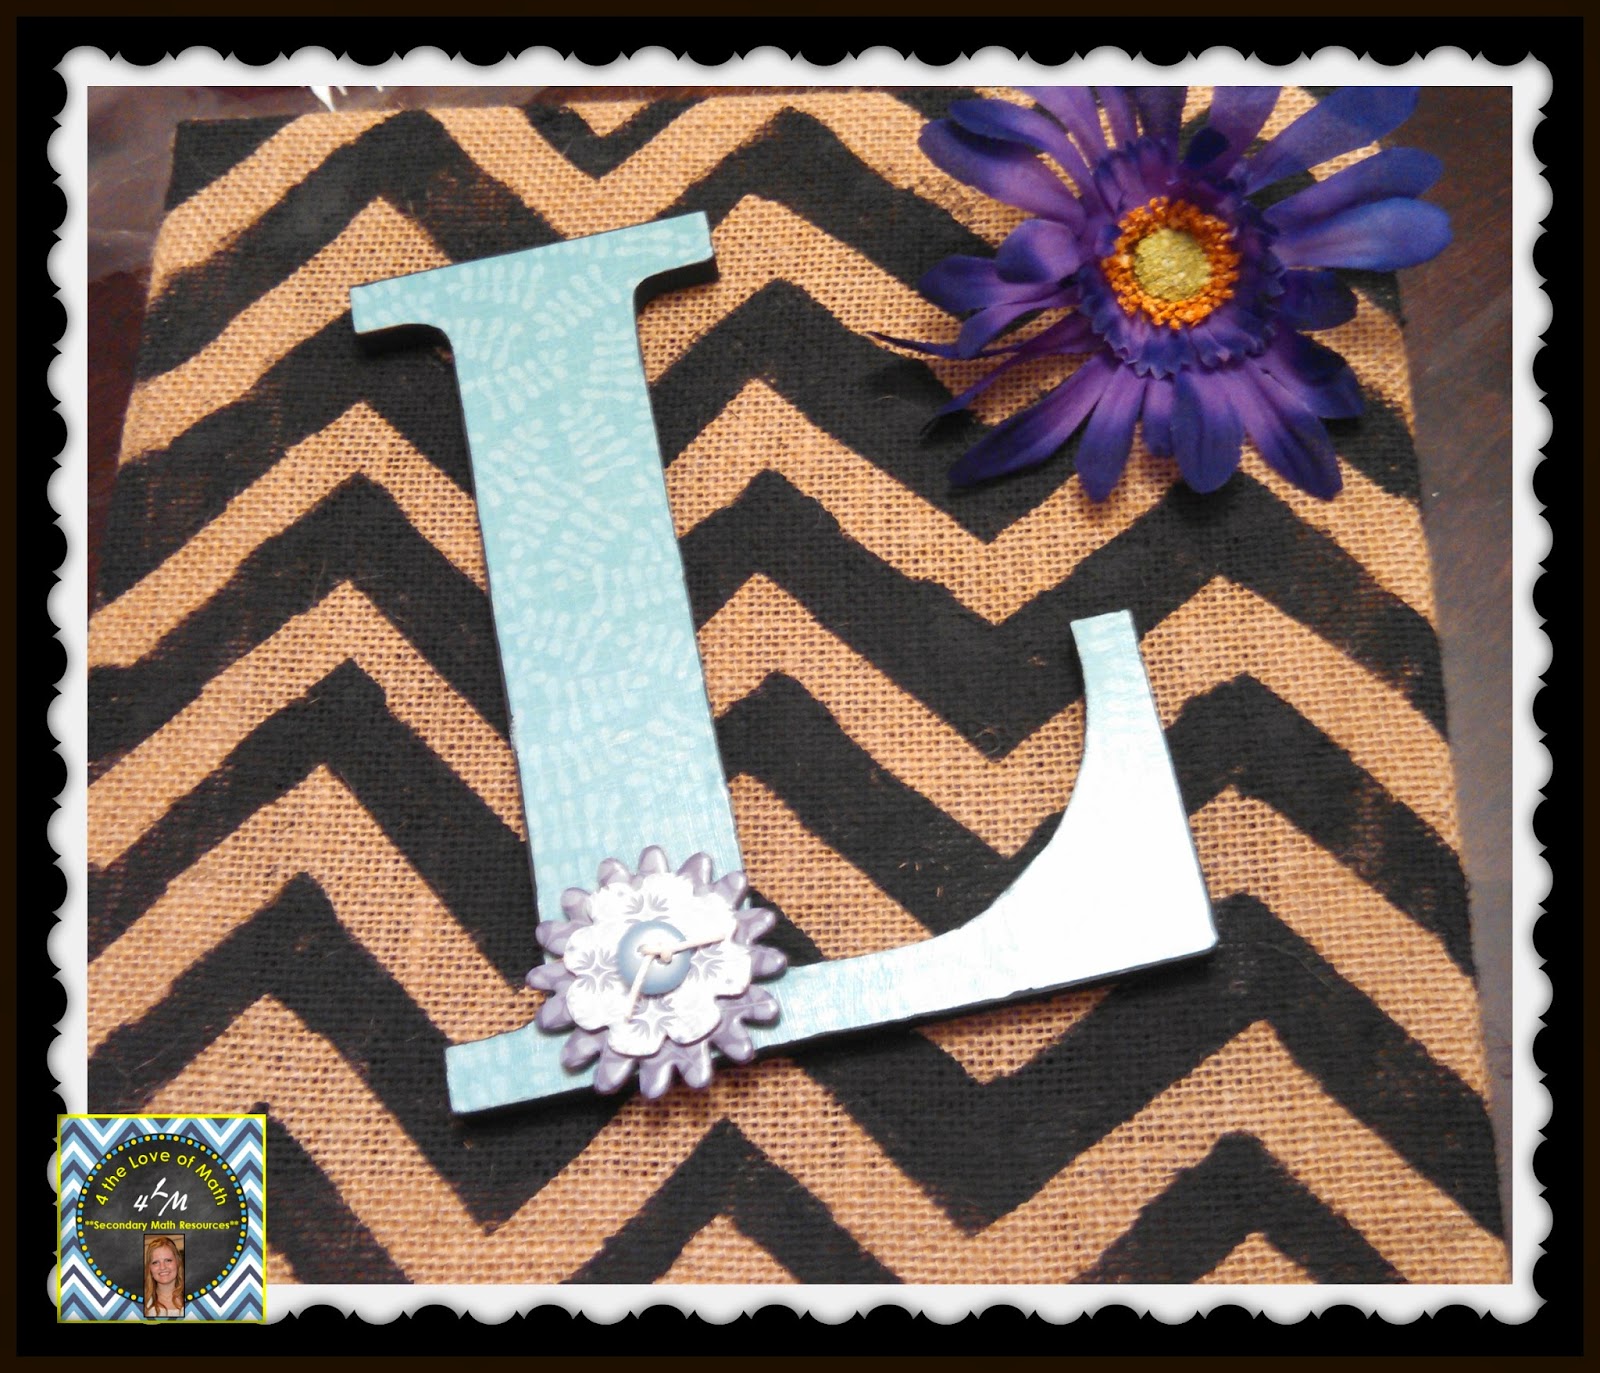
My latest word wall looked something like this: 
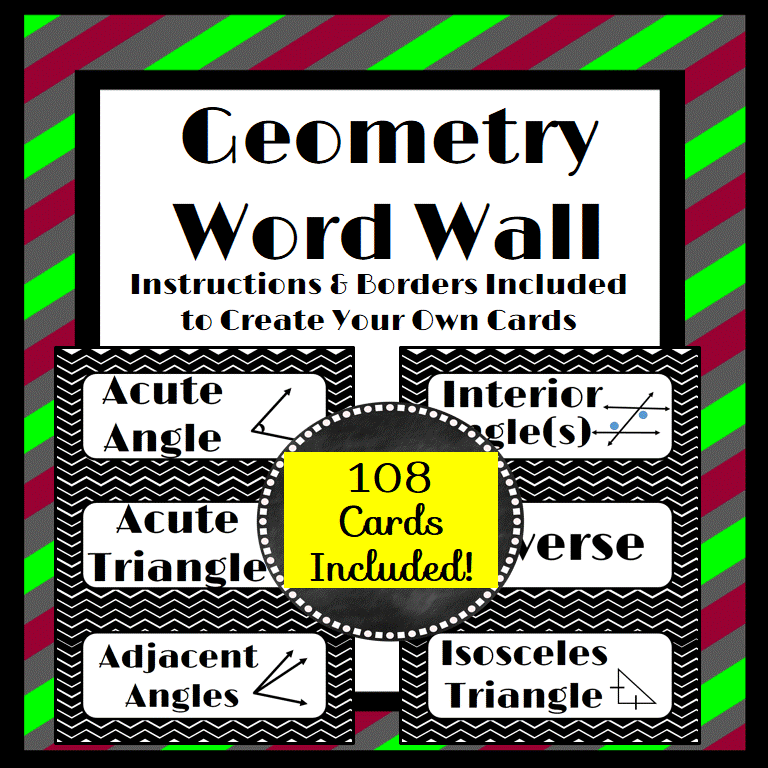
The words were easy to distinguish and I really like the font used! (Limelight). If you are looking for a ready made word wall check out these sets I have posted in my teachers pay teachers store. Each set includes an editable version so that you can easily create your own words to add!


Have you ever used a word wall? How is your word wall displayed? I'd love to hear how you do it, please leave comments below!
Have a great weekend! 


Background for this blog post came from: Glitter Meets Glue and Emily Wean. Fonts for the pictures are from: KG Fonts. 

Monday, August 25, 2014

#1 Way To Use Task Cards in the Secondary Classroom

Task cards work great in the secondary classroom!

I started using task cards when I was student teaching. Back then I didn't call them task cards - I called them index cards. Basically, that's what they were. I would write questions down on index cards, stick a card under each students desk, and that was that. 

When I discovered Teachers pay Teachers I started creating more colorful task cards. Typically task cards I use look something like this: 
 
There's a problem for students to find an answer for. Some task cards are multiple choice, some are short answer. I prefer short answer cards. 

While I was teaching 8th grade math I watched an episode of NCIS that included some speed dating scenes. I was creating my lesson plans for the week and watching the show and all of a sudden I had an idea of how to merge math and speed dating. I like to call it "speed math." 

The premise of speed dating is for each individual in attendance to share information about themselves in a short period of time, with other members of the group. Speed math has students share information about a certain assigned problem with other students.

Set up for speed math is similar to speed dating - 2 rows of chairs facing each other. Similar to the picture below.
When students are sitting, each student gets their own task card. This task card stays with them the ENTIRE time they are doing this activity. Once task cards are passed out, students do whatever they need to do to determine the solution for the card they hold. If they need assistance on that first card, the first person they turn to is the student sitting across from them. So if student E has a problem, they should ask student F for help. As a last resort students can ask the teacher for assistance. This first step is crucial to the activity working. Students become an expert on their card so that they can later help explain the process to other students if needed. I do take care to assign students cards that match their academic level. Students who are struggling receive easier cards, students who have a strong grasp on the subject matter receive more difficult cards.

Once each student has mastered their card, the activity really begins. Choose one row of students that will be the movers in this game. If the vertical row that begins with student B is the row of students that will move, have them all stand up and move down a chair. Student B will move to student D's seat sitting in front of student C. Student D will move to student F's seat facing student E, F will move to H, and H will move to B's seat facing student A. Students take the original card assigned to them to their new seat. 

Once students are in their new seat, the new partners exchange task cards with each other. For a given amount of time (generally I aim for 2-3min) students try to solve the card their new partner handed them. After the first switch, partner A will work to solve partner H's card, partner C will solve partner B's card, etc. Once time is up students share their answer with their partner. If they have correctly solved the problem on the card, great! They are finished. If their answer is incorrect, or if they have not been able to figure the problem out, their partner is there to help. Since each partner is an expert on their card, they should have no problem figuring out where errors occurred, and then they can explain the correct way to solve the problem to the other student. If they were speed dating they would share about themselves - with speed math they share the process involved in solving their task card. 

Once every partnership has solved the cards in front of them, the row of students who move gets up, moves down another seat, and switch cards with their new partner. This can continue on as long as you choose to allow it. I tend to keep it to each student solving 10-12 cards. 

Obviously some classes will not have an even number of students. Those types of classes are personally my favorite though! When that happens I sit in the empty chair, assign myself a task card, and play along. It gave me one on one time with students, and I had a great time making small mistakes solving students cards which would lead to getting to hear them straighten me out. 

I promise if you use task cards this way you will be amazed at the conversations that occur throughout the activity! Students who normally put a wall up and sit quietly in their seats often speak up and enjoy teaching other students how to do the math. Kids who often struggle in class get excited to share how to solve their cards because actually knowing what is going on is new to them. Students take pride and ownership while playing because they have established themselves as an expert on their problem. The continuous change in partners keeps students involved in the activity and excited about it - I don't know about you but I remember times when I was in school were I was stuck with one partner for an entire class period and just hated it. 

While this is my favorite way to use task cards there are lots of other great ways to use them too! Rachel Lynette, one of the top sellers on teachers pay teachers (and a task card queen!) created this awesome free Task Card handbook which can be downloaded here: Task Card Handbook. Also, if you are looking for a set of secondary math task cards to try out, check out this free set I created on solving One Step Equations:

Have you used task cards before? What is your favorite way to use them? 


Monday, August 18, 2014

Monday Made It: Week 12


I missed last weeks Monday Made It because of a last minute end of the summer vacation we took to Michigan. I'm super excited to be home and to have survived the first 3 days of school down here in North Alabama. Last week was slightly crazy, but very exciting too. For some odd reason I decided that our living room walls needed a make over (they've needed a make over since we moved in - last Thanksgiving buttttt I just didn't get around to doing anything about it until this week!). I'm excited to share what I've created in this weeks link up hosted by  by Tara from 4th Grade Frolics
A few months ago I purchased a 16 x 20 canvas collage to hang in our living room. I love how it looks, but even on sale I paid around $30 for it. I wanted some more canvases to put up behind our couch so I decided to make some!

 I found 8" x 10" stretched canvases at Walmart on sale ( around $3.66 for a pack of 2). I then printed out some 8" x 10" pictures at Walgreens (make sure to Google "walgreens photo coupons" before purchasing prints - they always seems to have great coupons!) I paid around $11 for a couple of 8" x 10" prints (I had a 50% off coupon). I also used mod podge (which I had already) and black acrylic paint. 

 To begin, I painted the outside edges of each canvas with black acrylic paint. Trust me - the black makes the canvases look better! Once the paint was dry, I applied a layer of mod podge to a canvas. By apply, I  took a paint brush and brushed it all over the canvas. Immediately after putting mod podge on the canvas I centered my 8" x 10" print to the canvas. Then, I applied a layer of mod podge over the print. 

I was really nervous to apply the mod podge to the top of the print, but trust me, it dries clear!! Make sure to spread out any clumps though!

Once the layer of mod podge dried, I painted another layer of black paint around the edge of the canvas AND around the edge of the print (without painting the edge of the print, you may be able to see a white edge). Once that layer of paint dried I applied one last layer of mod podge over the ENTIRE canvas (top and sides) and allowed it to dry. 

I am so happy with how they turned out!
*Tip: picmonkey.com is an online photo editor. The basic version is free. You can use it to darken the edges of your pictures before sending them to the printer - the dark edges look nice with the black paint I painted the outer edges with.
Since we moved into our house our living room wall has a 16"x 20" photo collage, and a letter L that I had wrapped in twine and hung on the door of our previous house. The letter is old and ragged and blended into the wall -- it really made the wall look bland, see:

YUCK! Before the glue turned yellow it looked nice against our red front door, but on the wall it just looks icky. 

I like the concept of having an L but I knew I needed a different way to display it. I purchased a 12" x 12" burlap canvas (from Walmart again -- it's the only place that sells craft supplies with a 50min drive!). I also purchased a wooden L. My first step was to paint the burlap. If you use Pinterest you have probably noticed all of the tutorials claiming they will show you an easy way to paint a chevron pattern on a canvas. I checked out quite a few of the canvases and was positive I could duplicate a chevron pattern on my burlap canvas. I figured "hey I have a bachelors degree in math - I can do this!"

 I did do it, but oh my gosh - it was tough!! In the end I used a lot of electrical tape, and a cardboard chevron cut out. I taped off the top part of the chevron pattern, and held the cardboard along the bottom edge of where I wanted to paint. Once I had one strip completed I put electrical tape along the bottom edge of the previous strip, then positioned the cardboard approx. an inch below the tape, and painted between the two. 
  It's definitely not perfect, but I'm ok with that - it's home made! Next, I cut some green patterned scrapbook paper to fit on the wooden L I purchased. I placed mod podge on the L, pressed the scrapbook paper on it (and smoothed the paper out!), then mod podged over the top of the letter. Like the canvases, I painted the outside edges of the L a dark color. I think it makes the L stand out more!
Finally, I pulled out some scrapbook stickers I purchased from Hobby Lobby years ago and forgot about, stuck a sticker to the L, then hot glued it to the canvas. 
Here is how it looks now (much better than the old L!)
I'm debating rather or not to add a fake flower to the top corner. I like the way it looks now, but I also like the idea of adding color to the bland walls. What do you think? Leave it as is, or add a flower? Here's what the flower choices are:
 Purple, Yellow or As Is? Let me know in the comments, please! :)
The only other thing I did this week - besides creating things for the living room - is update the products I have posted on teachers pay teachers. It's amazing how things I thought were great 2yrs ago now look dull and boring. One of the things I updated were my Solving Two Step Equation Task Cards. This was the old look: 

This is the new look:

I definitely prefer the new look! Using unique fonts really helps make school work look more interesting. My favorite font creator is Kimberly Geswein,. Her store can be found here: Kimberly Geswein Fonts. Her fonts are FREE for personal use! That means you can download them and use them to create items for your students! Commercial use licenses are $5 each (which is a real bargain!) so make sure you purchase a license if you plan to sell your creation. 
__________________________________________________________________
For all of my teacher friends out there make sure to stop by Teachers Pay Teachers Wednesday August 20th a for a special one day "Back to School Boost" sale! My store will be 20% off (as will many other stores on the site). Use promo code "Boost" for up to 28% off throughout the site!

I hope everyone has a great week! I can not wait to see what other people have linked up on the Monday Made It linky party this week! 

Monday, August 11, 2014

Keeping Students Responsible For Missing Work


As teachers we know there will always be students who can be counted on for anything, and students who can not be counted on at all. Most of the time these students are not disruptive and do not need major discipline - they are just lazy. While laziness is obviously common, in my book it is not a good excuse for missing work. Students who walk into class without their homework are breaking a rule. Students who walk out of the classroom without turning in their daily work (or without turning in a test -- happens to me every year!) are breaking a class rule and they need to be held responsible for that.

In order to keep track of who is staying on track and who is not, I keep a stack of student responsibility reports on my desk. They look like this (and can be downloaded for free by clicking the picture): 
When a student walks into my classroom without their homework, they pick up a sheet. When everyone else turns in their homework students without their work turn a form in. If I grade papers and find out Julie did not turn in her classwork Tuesday, Julie ends up with a paper on her desk to fill out Wednesday explaining why her paper was missing. 

These sheets have 2 purposes. 
1) They make students take responsibility for their mistakes. Students do not like signing a paper acknowledging they did something wrong! 

2) If a student ends up with a low grade in the class due to missing work, these sheets eliminate problems with parents and/or administrators. Every 0 in the grade book is backed up by a paper the student filled out on their own (and signed!) explaining why the work was missing. 
 
They are also great to pull out when parents come in with the "but my child said they turned that assignment in" excuse. All I have to do is say "well Mrs. Jones, Jesse may have told you that but I have a form right here that Jesse filled out for me explaining why he didn't turn that in to me."

Every page I receive gets hole punched and stuck in the binder I keep for missed work. I use dividers to separate the pages by class so that I can easily access the sheets as needed. 

How do you address missing work? 


Note: Graphics for this page came from: http://www.teacherspayteachers.com/Store/Ashley-Hughes-38

Thursday, August 7, 2014

6 Tips for a Great First Day of School

The first day of school is extremely important when you are a secondary teacher. The key to having a successful day is to plan plan plan!

Here are my tips for surviving the first day of school: 


1)
 Dress professionally, and greet each student with eye to eye contact as they walk into your classroom. That first introduction can set the tone for the type of relationship you will have with your students for the entire year. Start the year right by doing what you can to acknowledge each student. It only takes a few seconds to introduce yourself and make sure they know you are excited to have them in your class.


2)
 Have assigned seats from day 1! It's tempting to allow students to choose their own seats (after all they are almost adults!) but allowing this gives students control rather than establishing that you are in control. Be in control from the second students walk into your classroom - assign seats!


3)
 Start the first day of school the way you plan to start every other day. Get students comfortable with your classroom routine ASAP. I always use bell rings, so the second students walk in the door there are instructions on the board telling students to pick up the bell ringer paper and complete it. Consistency is key!


4)
 Spend no more than 15 minutes explaining your expectations for the year. The average person stops listening to something within 15 minutes. Your expectations are important for students to hear and understand. Find a way to share your expectations quickly and efficiently. Creating a simple PowerPoint show is an easy way to share!


5)
 Show students that you are human! Create a poster board all about you to share with students or post some pictures of your favorite things on the bulletin board. Share something interesting with them. I had a teacher friend who was really sweet and motherly. Every year she shows her students a picture of her on a motorcycle with her husband, wearing leather. Students are always surprised by the picture and excited about it. I always hear "did you know Mrs. S rides motorcycles?!?!" Showing the picture is a way she bonds with her students.


6)
 Have a discipline plan prepared that is easy to enforce. Students should know that if they do *insert offense 1 here* they will have to stay after school for detention the following day. Let them know there are consequences they will have to face if they choose to disobey your rules. Remember - you are in charge!


Make sure that you do not just have a discipline plan for behavior problems. Plan out what the consequences will be for students who do not complete the work you assign them.

Check out Monday's post to learn about how I keep track of students who do not complete school work. ******Spoiler alert: I use this chart:  ******


Note: Graphics for this page came from: http://www.teacherspayteachers.com/Store/Ashley-Hughes-38

Wednesday, August 6, 2014

Back to School eBook

Gina from All Things Algebra compiled a FREE eBook specifically for secondary math teachers. It is full of tips from a bunch of TpT math teachers. There should be at least 1 free resource on every page! To download the book click the picture below:


And don't forget to leave feedback thanking her for all of the work she put into compiling this book!

Hope you have a wonderful day!

Monday, August 4, 2014

Monday Made It Week #10


It's time for another Monday Made It linky party woot woot! Hosted by Tara from 4th Grade Frolics.  We are headed to Michigan for a quick grandparents visit later this week so this past week has been "get ready for school week!" I'm excited to send my daughter to first grade, but am sad at the same time. It's been so great spending the summer with her. Every day has been a new adventure - she is so full of life and excitement! We've had fun this week with some back to school projects.       

A few weeks ago on Etsy I saw some awesome zebra print pocket folders. I had that "I have to get these" thought pop in my head and came super close to pressing that purchase button and spending *gulp* $32 on 4 pocket folders, but I didn't. Luckily, the rational side of my brain took over and I thought "hmm I bet I could make something like that for cheaper!" Off we went to Staples where we purchased four 2-pocket folders plus some Avery full sheet label paper for around $15.
When we came home I logged onto Teachers Pay Teachers in search of zebra print background paper. After a quick search on Teachers Pay Teachers I found a store named Jax and Jake that had just what I needed - leopard and zebra print digital papers in 14 different color combinations! I paired the digital paper with a cute frame from Ink n Things and added Dixie's name to the frame with Hello Sweetie Pie font (by Jen Jones). I printed the pages, attached them to the folders and voila - 4 personalized zebra print folders just waiting to be filled with first grade goodies!


Of course being an animal print obsessed 6 year old, Dixie loves them! *Score 1 for mom!*
After spending all that time on Dixie, I decided it was time to make something I enjoyed. Subway art is huge on Pinterest nowadays so I decided to give it a try! I headed over to picmonkey.com (an amazingly easy editing website) and started creating an Algebra themed subway art poster. I printed out a list of algebra vocabulary words I wanted on my poster, uploaded a chalkboard paper background to picmonkey, and started adding text. I really love how it came out! For right now I am going to print it out and hang it by my desk. I think it'd look awesome hung in a classroom though too! To download and print your own copy you can click on the picture below. This should take you to a Dropbox page where you can download the print to your computer. 
I'm thinking of doing a geometry themed one next (they are addicting!!) what do you think?

Quick summary - made it #1 was for my daughter. made it #2 was for me. So, made it #3 is of course for.......Dixie's soon to be first grade teacher! While we were out school supply shopping one of the cheapest items I saw were pencil boxes. Pencil boxes can be used for so many things! For $0.50 I couldn't help but pick up a few extra! One of those extra boxes was turned into a teacher survival kit this week. 
I printed out a small label, and used double sided tape to attach it (double sided tape is amazing, isn't it?!?)
We then filled the inside with things any teacher might need for that first week of school. Advil, band aids, a nail file, chap stick, a sharpie, hand sanitizer, post it notes, tic tacs, zebra print pens (bet you don't know who picked those out!), and of course, CHOCOLATE. Hopefully Dixie's new teacher appreciates it.
I really enjoyed creating this week in preparation for the new school year. Have you been preparing for school too? I hope everyone has an enjoyable week. 

For all of my teacher friends out there make sure to stop by Teachers Pay Teachers today Aug. 4th and tomorrow Aug. 5th for the annual Back to School Sale! Save up to 28% in EVERY store using promo code BTS14 at check out. This is the perfect time to stock up on everything you need for the upcoming school year!